Thank you all so much for the birthday wishes (yes it was the big 50..ick). And for all the lovely comments on my dress. You guys really appreciate the effort that has been put into fit and then the extra details. No one at the party seemed to "get" how excited I was about the dress, except perhaps my two gorgeous daughters.
With the success of the dress I feel now that I can blog about the saran wrap process, my sloper comparison to pattern et al! I have also received the fitting DVDs from Mary Beth and have watched them so will do a review later this week on those too. I have to say I really enjoyed watching them and learnt a trick or two.
So now to the saran wrap. I learnt about this from Liana and Kathleen Fasanella. Liana recently did a post on her experience with the process and also has links to Kathleen's tutorial. Here is also a link to the tutorial.
This was a very easy thing to do and I only needed the help of two teenage daughters. Really one would have done but the more the merrier! So some photos:

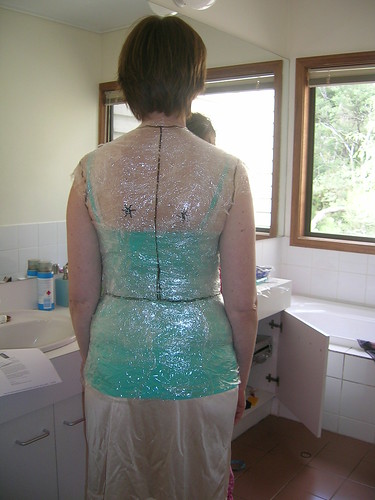
We used small pieces of saran/glad/cling/sandwich wrap. At first it did not seem to want to stick to my body but as we put more and more layers on it stuck together quite well. We marked main body points - apex of bust, apex of shoulder blades, armscyes, neckline, waist. We used sticky tape to tape the lines on the side, back and front before cutting those lines so that they would not distort.
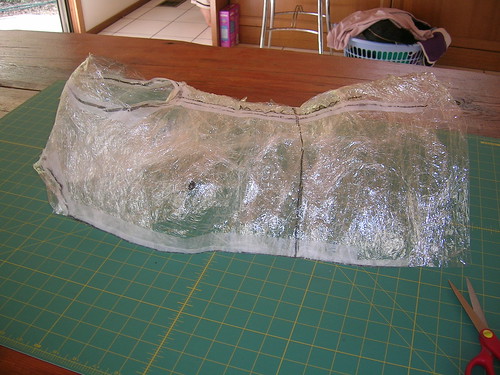
After cutting the wrap off it still has the shape of my body. We need to turn it into a flat pattern. I decided to just do the waist up. But have kept the hip area for later use. I may one day redo the exercise and have a complete sloper, I'll see how well this works first. But either way it is not a big exercise to do. Maybe half an hour?
From here I cut darts to flatten the wrap, copied it onto paper, rotated some darts and added some ease. Details on rotating darts can be found in Fit for Real People and also in many other books (and probably somewhere on the internet).
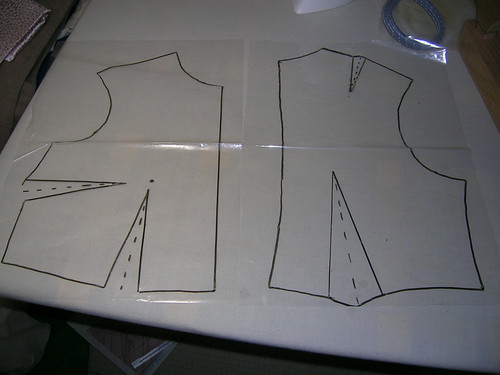
I have now copied the sloper onto plastic to make it see through. This will make pattern adjusting easier. I didn't have this when I adjusted the green party frock pattern but this will just make future pattern adjustments easier.
I have documented the process on my Flickr album here. Hopefully the process is clear enough.
Next post I will talk about the Linda Maynard CD book that I purchased that shows how to adjust patterns using your personal sloper.
15 comments:
very interesting, thanks for documenting in such detail. did you find there was much difference between your right and left side or will you still be able to cut patterns on the fold / doubled fabric?
wow, this is really interesting indeed, tfs
Glad to see you're still going on this! Very interesting, indeed.
That is so cool! This doesn't sound too scary or difficult - you've got me thinking that I could do it. Have you compared your saran wrap sloper to your old sloper to see the differences? That might be interesting and might illuminate some things about fit... Anyways, I can't wait to see the first top you make with your new sloper! :)
Gwen
Oops, sorry I missed sending you birthday greetings!
The saran wrap idea sounds interesting. I look forward to seeing more about it as you use the sloper you made.
I'll be watching with interest as th saran unwraps...ehehhehehe. You looked so gorgeous in your birthday frock! Very nicely done. Congrats on having your big 50, it only gets better from here IMHO
Glad to know someone else is a member of the Big 5-0 club. (I hit it in November.) Interesting post about building your sloper.
Thanks for sharing such great details, I will keep all this information close as I would like to try this too :) one day :)
That looks absolutely fantastic!! I must try this when DD returns in June (this is ONE thing I won't ask DH to do...) Thank you again for posting the whole process so clearly. You should have a poll, "Was this helpful?", it would go through the roof with a resounding "YES!!!"
HTH,
Birgitte
Vicki, I too will be watching your progress. The sloper is such a wonderful idea, and I've seen what Liana accomplishes using hers. I just can't get my brain around exactly *how* to use it to adjust patterns.
Oh, and I will hit the big 5..0..this year too. Don't forget, 50 is the new 30...hence we are turning 30 this year.
Vicki .- very interesting this post. To me, reminds me of the techniques used by my teacher at the workshop couture. It toward the top of the dressed mannequins, is a technique with very good and very close to the action of the body. Congratulations and thank you for sharing this experience. Best wishes. Paco
Thank you for sharing this process, I find it very interesting and I will try it some day in the future! Well done!
This is fascinating and such a great idea! You'll have to show us how you've used your sloper to alter commercial patters :) I can't wait!
Vicki - I love the gladwrap idea and I've told so many people about it on your blog. I think I'll have to give it a go. Thanks for all the tips.
The saran wrap links have changed:
Saran wrap pattern making method #1
Saran wrap pattern making method #2
I'm glad this worked for you, it's looks great.
Post a Comment