As I mentioned in a previous post, I had purchased the CD book - De-Mystifying Fit: Using the moulage to adjust commercial patterns by Lynda Maynard. I heard about this book on Patternreview. It cost US$27.95 (less for members of PR). $8 international postage.
The CD book comes just in a CD case without any pretty cover or printed notes. It is a PDF file that you can print out. I printed mine out on my home laser printer - all 282 pages of it.

It has an introduction, notes on the photos and how the book is set out, and then the process of using the moulage to adjust the commercial patterns. You don't need Kenneth King's moulage to be able to make use of this book. Any sloper that fits you will work. The examples in the book show mainly a sloper with wearing ease.
The book contains 9 case studies and covers just about everything including bust adjustments, petite adjustments, sloped shoulders, large hip etc etc.
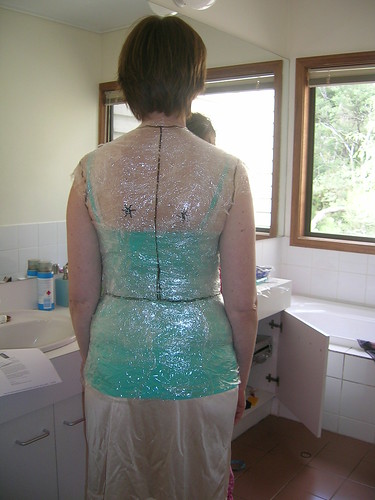
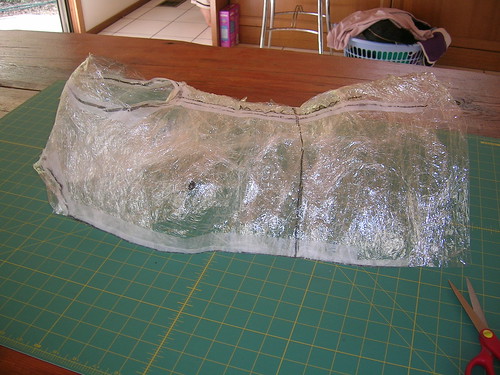
I used my sloper made from my saran wrap. I used this method of fitting for my party frock and now am putting it to test on Burda 09-2007-109.
109 comes in sizes 36 to 44. I need a 34 in the shoulder and chest area. I could have graded down the 36 but decided to start with the 36 and compare to my sloper. This pattern is called a blouse jacket and is more of a blouse really. I won't be wearing anything under it except maybe a cami or t-shirt. And it does not have shoulder pads. So I can use my sloper as it. I don't need to adjust the sloper as I would for a tailored jacket.
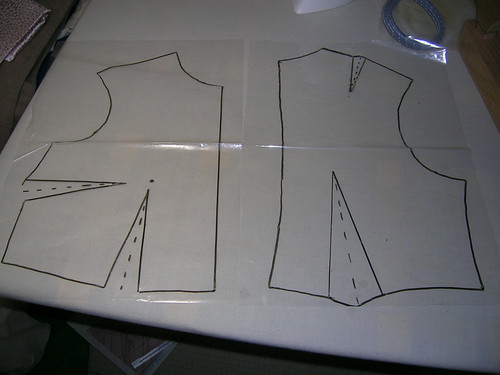
 (click on the photos to see the pencil lines of the pattern. The black lines are my sloper on plastic)
This picture shows me putting my sloper over the back and side back pieces. I match up the waist and check my neck shoulder point with the pattern. I need to shorten my back by 2cms.
 Once I have done that I check for shoulder slope(adjustment needed here too). The back is also too wide - see the armhole? The next photo shows the changes made so far in red. I have adjusted the armhole halfway between the pattern and my sloper. I am hoping that this will work - bringing it down to about size 34 but also leaving a bit more ease.
 You can see my new cutting lines in red. I have adjusted the shoulder according to my sloper - taken it out and down a bit. I am not sure whether I should adjust the neckline as well. I have just drawn a dotted line where my sloper goes. I can check this when I get to the muslin stage. Also I am not sure about my curved back. Do I add a back seam to fix that? Or adjust the side back seams? So much to learn..... Hopefully the muslin will also tell me something there. I am sure I will have more than enough ease and I can take the seams in to fit where I need.
Also you can see my sloper has a back dart but the pattern has princess lines. My dart is larger than the dart created by the princess line so again another reason to think that this pattern will need to be taken in in the seams.
Next post I will show the my front adjustments.