Friday, January 2, 2015

Poppy Zip Front Top for Sofie's 21st.

My baby turned 21 back in September and I din't make a dress for her.  I would have truly but she decided she didn't need the stress and bought herself an outfit.  Me, I needed the stress obviously as I tried my first Stylearc and planned to refashion a leather skirt to go with it. The top Poppy was a  hit but the skirt is still in disgrace.

I bought the fabric in Shenzhen in China.  A floral and a matching navy solid in silk.  As it turned out it wasn't silk (am I surprised?) but pretty non the less.  I used some of the baby soft leather from my disgraced skirt as accents.  Luckily I had an old skirt in the wardrobe that matched the teal in the top pretty closely which saved me some late minute sewing for a bottom.


This was my first Stylearc pattern and I had a bit of trouble following the instructions.  Very sparse and not clear at all with the pleats.  In fact parts of the instructions were wrong and a non matching notch added to the confusion.  Its a cute top though so perhaps I will forgive them.  I purchased the top based on my bust measurement but ended up taking in the  princess seams from bust  point to the shoulder about 8cms.  I did do a muslin first without any alterations and found that I didn't have to do my usual short waist adjustment nor the forward shoulder one.  The neckline also is not quite so high or fitted as shown on the illustration.
Overall I am pretty happy with the top.  It could have been sewed a bit better but as usual I was in a hurry!  New Year resolution - don't wait till the last moment to actually get started!
The birthday girl with her non mother made outfit.  And a selfie of the three of us -


Sunday, December 28, 2014

Jumpsuit (of sorts)


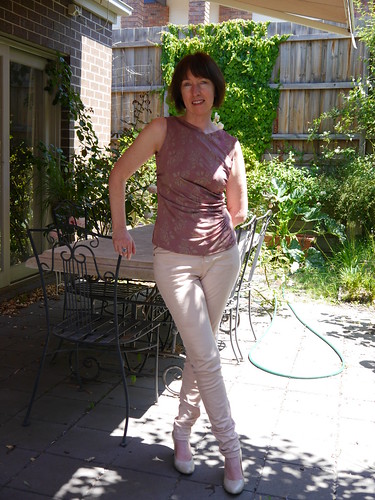
I made a new outfit for my work Christmas function and for family get together on Christmas day.  I like the look of the jumpsuit but really wouldn't get a lot of wear out of one.  So I made separates and just pretended.  I tucked the front of the top in and left the back loose to defect the backside view :)

The pants are Stylearc's Lola's pants.  Elastic waist and elastic at the back hem.  I made them up based on my hip measurement without any alterations.  I figured with lose fitting elastic waist pants, can't have too much go wrong?  The fabric is a silk (crepe I think) I bought a few years back in China.

 I didn't add the pockets - no time for that!

The top is another version of the free Marfy 1913.  I constructed it the same as my last post except no hand sewing - I was on a mission..  No time for the elastic hem either!  Luckily the outfit turned out well and I got a lot of compliments.

I've made a few things this year and the next post will be on another Stylearc I made for my daughter's 21st.

Saturday, February 22, 2014

Marfy 1913

I've joined Leisa from A Challenging Sew with the free Marfy sew along.  The first make is the top 1913.


  • I didn't do a muslin but did check the measurements to ensure I have enough room.  It is a loose top and  the smallest size offered (42) I have found to be a bit big on me in the past.  I figured I could always take it in.
  • I used a 20 + year old poly I had in my stash.  I know it is at least that old as I bought it from Lincraft at Eastland before the redevelopment back in 1993.  Surprisingly it sewed up really easily, no puckers at all.
  • I added 1cm for seam allowances and sewed french seams.  
  • I added 2cm for the hem and used Leisa's method of hemming. I think I can omit this next time as a normal adjustment for me is to petite the bodice by 3cm, which I did not do with this. Not really necessary as there is no defined waist.
  • I used self made binding for the armholes and french binding for the neckline.  I followed this link and added the cute bow at the back.
  • I cut the back and added a seam.  This I did before I read all of Leisa's instructions - oops.  I am happy how it turned out actually as it doesn't gape as much in the back as the slit versions of others seems to do. I will try the slit version next time and see how I like that.
  • I didn't use the collar for this version.
  • Just happened to have matching belt and shoes in the closet - sweet!


I would like to try the elastic hem and collar for the next version.  And I have ideas also of making a lower neckline version with less cut away shoulders.

Details: Back closure with bow, shoulder seam with french seam and edge binding, hem treatment, neckline french binding.

Tuesday, February 4, 2014

Vogue 8706


Some more fabric out of the stash and another pattern used! Vogue 8706 is a nice knit dress and a relatively easy make.  My fabric is a reasonably thick polyester lycra bought many years back from Frou Frou fabrics, which closed down a few years ago.


The pattern has a few interesting details - the armholes have piping, the shoulders are asymmetrical in addition to the gathering.  The back is cut on the bias which I don't think is really necessary for a four way stretch fabric however I cut it that way as instructed.


While the pattern was out I also made a top from a fabric that is even older than the one above.  Ah it is good to get it out of stash and into my wardrobe!
This version I didn't bother with piping (I just bound the armholes) and didn't cut the back on the bias (didn't notice any fit difference).


And while I was at it I used the remnants to whip up an elastic waist skirt.  I had to join a piece into the back so make a feature of it.  Some top stitching and split are nice I think.


And for some fun a la Carolyn, some dance moves!


Friday, January 10, 2014

Vogue 1250

Another year!  I have joined the RTW Fasters and have started off the year with putting Vogue 1250 to good use.  This is a pattern that has been around for a few years.  A very easy pattern that looks fabulous on everyone.  I made three versions it is so good.  Two dresses and a tunic length top:


For the tunic I shortened it and redrafted the bottom back section to have more flare.  Time now to step aside from V1250 :)

Saturday, January 5, 2013

It has been a long time....

I have been away from this blog for a long time.  I haven't been sewing.  I haven't been doing much except following along with everyone else.  But over the last month or so I have felt ready to get back into it.  In fact I have started a new blog called Create.

I want to keep this a sewing blog yet I wanted to talk about my other creative outlets.  I am not a sewing but nothing else kind of gal.  I go through stages.  I follow a lot of design blogs and motivational blogs.  And lately Paleo blogs.  I will cover all of this on Create.  I would love you all to follow me on Create as well as here.  I plan to keep sewing mainly to this blog.  I think sewing blogs are a pretty special place and I didn't want to clutter this with other random stuff you may not be interested in.

Many thanks to all of you who have been sewing up a storm while I have been absent.  I have loved following along.  And a special thank you to Rhonda who has included me on her Wednesday Showcase Hall of Fame!  Woo hoo, I hardly deserve it but am very appreciative none the less.  I also need to thank Rhonda for posting about The Artist's Way a few months back.  I read her posts, then purchased the book, and spent 3 months working my way through the exercises.  You just never know when you post something how it will effect a reader.  This creative exercise started the ball rolling.

I was lucky to follow up the Artist's Way with a Women's retreat in Bali.  This trip I shared with my sister and it was a spiritual and creative reflective time.  Bali is beautiful and very spiritual.  I had never been before.  I created two dream boards - one with the Artist's Way and another during the retreat.  A dream board is a collection of images that inspired your put together on a board as inspiration.  In both cases I came up with home and garden pictures mainly.  Beautiful images of serene places.  My quest for 2013 is to create these beautiful images around me in my home and my garden. I hope to explore this on the new blog Create.

I also discovered that I am very much a DIY person.  Always  "I could do that".  But as would be shown by my lack of posts here, I have lots of plans to DIY but little energy or motivation to follow through.  So what is different now?  Paleo.  Yes, change of diet. I was looking for ideas to help me sleep and googling up I found details of the caveman diet.  I have previously followed strict eating plans due to digestive issues but I have never cut out all grains.  I found the 30 day challenge and I thought why not give it a go.  I am good at following through when I decide what I am going to do and completed the challenge on 22 December.  And following this diet plan was easy to do.  The results? I somehow lost my "can't be bothered" and have since been completing projects ever since.  Not any garment sewing...yet.

My sleeping has improved but I still tend to wake up early.  But rather than complain, I am OK with it and use the time to read blogs!  And an unexpected bonus is I lost 4.6 kgs in weigh - without even trying!  So I am looking forward to 2013 and hope my enthusiasm to get things done continues.

Anyone else follow a similar diet and noticed similar results?

Next up is some well overdue home sewing projects :)

Goddesses dancing in the retreat pavilion amongst the rice paddies.  Beautiful way to start the day at out Bali Women's retreat.

Monday, November 28, 2011

Sofie's Valedictory Dress

My baby Sofie graduated from high school recently and I made her a new dress for her Valedictory dinner.  I anticipated this event a while back and bought some silk chiffon from China on my last Hong Kong visit.  The fabric is an ombra that is black on both selvages and grading to white/cream in the middle.  Luckily she was happy with the fabric.

I used a mix of patterns - a bias cut night dress 12-2008-128B for the skirt and Butterick 5029 for the front bodice.  I then cut long ties - very long rectangles and attached them just under the bust.  To keep things simple I used elastic across the back to keep the dress close to the body as per the nightgown pattern - so no zip or other fastener needed!  I later went back and added elastic under the bust too to keep that area also closer to the body
You can see the bodice here and the rectangles hanging down. I also stitched the beads to the shoulders to keep them in place as Sofie wore the dress.
The ties wrap up over the bust, tie up at the back and hang down the back.  It was a bit of trial and error to see what looked good.  We ended up twisting around the bodice neck and tucking in around the bodice.

Of course the occasion required fake tan, hairdo, heavy makeup and false eyelashes!  The photos (except the dress form ones) were taken on a fancy smancy camera owned by Ellen's (dd1) boyfriend.  More can be seen here